Being a developer, we always think of REUSABILITY and REACTIVENESS when it comes to building interactive UIs. Isn't it?? Is this because we are too lazy to write code again & again?? NOOO...that's because we need an enriched application with #best code quality, #better use of language semantics + robust application.
React somewhat perfectly fits to above properties or what we say in terms of react itself - inherits above properties using/extending JS {...props}
React is a component driven & declarative JS library used for building user interfaces.
Let's understand what actually Component driven and Declarative means!!!
Component based or Component driven
Using the React semantics we can actually create isolated, generic, and reusable components, which can be further be encapsulated to manage their own state, properties and then finally get composed to make complex UIs.
Build encapsulated components that manage their own state, then compose them to make complex UIs
Declarative
We often talk about "Reactiveness" while building our applications. This is because, we need a painless way of creating interactive UIs. That's what React is master at!!
It's just creating a simple component/view with it's own state and properties, and React efficiently helps to update and render the right components when your data changes.
Declarative views make your code more predictable and easier to debug
Let's get an overview of - How React works and how it makes a difference between a Simple component and a Stateful component?
A Simple Component
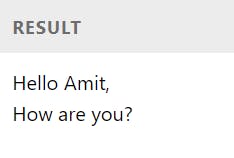
React components uses a render() method that takes input data and returns what to render or display. Below is a small example that uses an XML like syntax called JSX. This example uses XML-like syntax called JSX. Injected data that is passed into the component is accessed in render() method via this.props.
class SayHelloWithMessage extends React.Component {
  render() {
    return (
      <div>
        Hello {this.props.name + ", "} <br />
        {this.props.message}
      </div>
    );
  }
}

ReactDOM.render(
  <SayHelloWithMessage name="Amit" message="How are you?" />,
  document.getElementById('hello-message')
);
A Stateful Component
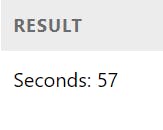
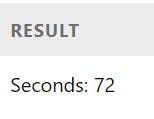
As depicted above, React can use input data with the help of props i.e. getting input data using this.props. In addition to this, React can maintain it's own state data i.e. accessed via this.state. Whenever a component updates it's state or a component state data changes, the rendered markup will be auto updated by re-invoking render() method.
class SimpleTimer extends React.Component {
  constructor(props) {
    super(props);
    this.state = { seconds: 0 };
  }

  tick() {
    this.setState(state => ({
      seconds: state.seconds + 1
    }));
  }

  componentDidMount() {
    this.interval = setInterval(() => this.tick(), 1000);
  }

  componentWillUnmount() {
    clearInterval(this.interval);
  }

  render() {
    return (
      <div>
        Seconds: {this.state.seconds}
      </div>
    );
  }
}

ReactDOM.render(
  <SimpleTimer />,
  document.getElementById('timer')
);
Below is the reference without JSX
class SimpleTimer extends React.Component {
  constructor(props) {
    super(props);
    this.state = { seconds: 0 };
  }

  tick() {
    this.setState(state => ({
      seconds: state.seconds + 1
    }));
  }

  componentDidMount() {
    this.interval = setInterval(() => this.tick(), 1000);
  }

  componentWillUnmount() {
    clearInterval(this.interval);
  }

  render() {
    return React.createElement(
      'div',
      null,
      'Seconds: ',
      this.state.seconds
    );
  }
}

ReactDOM.render(React.createElement(SimpleTimer, null), document.getElementById('timer'));
We will hear more on componentDidMount(), componentWillUnmount() methods during our visit to React lifecycle
Now, we can encapsulate both React state & React props to build a independent React component. Below is an example depicting the same. Here you will see, how 2 small components can be used to render a DOM -
class ShoppingListApp extends React.Component {
  constructor(props) {
    super(props);
    this.state = { items: [], text: '' };
    this.handleChange = this.handleChange.bind(this);
    this.handleSubmit = this.handleSubmit.bind(this);
  }

  render() {
    return (
      <div>
        <h3>Shopping list</h3>
        <ShoppingList items={this.state.items} />
        <form onSubmit={this.handleSubmit}>
          <label htmlFor="new-list">
            What to buy?
          </label>
          <input
            id="new-list"
            onChange={this.handleChange}
            value={this.state.text}
          />
          <button>
            Add item#{this.state.items.length + 1}
          </button>
        </form>
      </div>
    );
  }

  handleChange(e) {
    this.setState({ text: e.target.value });
  }

  handleSubmit(e) {
    e.preventDefault();
    if (this.state.text.length === 0) {
      return;
    }
    const newItem = {
      text: this.state.text,
      id: Date.now()
    };
    this.setState(state => ({
      items: state.items.concat(newItem),
      text: ''
    }));
  }
}

class ShoppingList extends React.Component {
  render() {
    return (
      <ul>
        {this.props.items.map(item => (
          <li key={item.id}>{item.text}</li>
        ))}
      </ul>
    );
  }
}

ReactDOM.render(
  <ShoppingListApp />,
  document.getElementById('shopping-list')
);
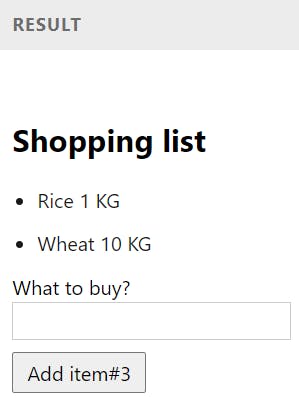
So, this is what we overviewed in this article
- What is react?
- Semantics and syntax of a simple component
- Difference between a simple and stateful component
- How to embed different individual components together
Keep watching this space for more readings...there is awful a lot to learn :)
Hope you find this post helpful!! Please feel free to leave your views/insights below in comments section. You can connect with me on LinkedIn

